GPT Chatbot: Building a basic chatbot powered by the ChatGPT API
In this chapter, we build a chatbot web app powered by OpenAI's ChatGPT API with Next.js and Tailwind CSS.
You can try the version hosted on Vercel here: https://basic-gpt-chatbot.vercel.app/.
The full source code for the web app and quickstart instructions can be found on GitHub: https://github.com/david-j-wu/gpt-chatbot.
The plan for this chapter
We’ll build on the basics of the OpenAI ChatGPT API covered in the previous chapter to create a backend API endpoint that sends a series of messages (latest and previous messages in a conversation) to the ChatGPT API and receives a response.
On the frontend, we’ll build a chat UI that enables users to converse with an assistant powered by the ChatGPT API via the backend API endpoint we have created.
Building the base web app
As in the previous chapter, we use the "Hello, World!" web app with Next.js and Tailwind CSS from the first chapter of this book as the base for our chatbot web app.
If you've jumped straight to this chapter and want to get started straight away without returning to the start of this book, then you can clone the "Hello, World!" web app from its public repository: https://github.com/david-j-wu/hello-world-nextjs-tailwind-css/tree/v1.0.0.
To do this, cd into the parent folder (i.e., projects) in which you would like to create your project folder. Then, copy-and-paste and run the following commands in your terminal:
git clone -b v1.0.0 https://github.com/david-j-wu/hello-world-nextjs-tailwind-css gpt-chatbot
cd gpt-chatbot
git checkout -b main
git remote remove origin
Once you have the source code open in your favourite IDE, install the dependencies:
npm install
Then run the web app locally:
npm run dev
Setting up our API key
Next, let's set up our OpenAI API key as an environment variable.
If you need to generate a new secret key, you can do so the API keys page of the OpenAI API platform: https://platform.openai.com/account/api-keys.
Create the file .env.local in your project directory, e.g., gpt-chatbot/.env.local, and populate it as follows:
OPENAI_API_KEY=my-openai-api-key-1
Building the backend
For the backend, we write an endpoint /api/chat that accepts HTTP POST requests. Locally, this endpoint is available at http://localhost:3000/api/chat.
Our endpoint works in the following way:
- Our endpoint receives requests with the HTTP method
POSTand a request body with a propertymessagescorresponding to an array of messages. - Internally, the endpoint will send a request containing
messagesto the OpenAI API's chat completion endpoint, which uses the model underlying ChatGPT, thegpt-3.5-turbomodel. - In the success case, the OpenAI API will return a generated reply to the messages we sent it, which we store in the variable
reply. - The variable
replyis then returned on the body of the response of our/api/chatendpoint. - We also include error handling logic to resolve cases where things go wrong.
The code for our backend endpoint
To proceed, we change the path of the file located at app/api/hello/route.js to app/api/chat/route.js, so that our endpoint is available at /api/chat instead of /api/hello.
Do this by renaming the folder hello to chat.
Then, we replace the placeholder code within it with the following content:
// Logic for the ChatGPT-powered `/api/chat` endpoint
export async function POST(req) {
  try {
    // Processing the request body
    const { messages } = await req.json();

    // Sending a request to the OpenAI create chat completion endpoint

    // Setting parameters for our request
    const createChatCompletionEndpointURL =
      "https://api.openai.com/v1/chat/completions";
    const createChatCompletionReqParams = {
      model: "gpt-3.5-turbo",
      messages,
    };

    // Sending our request using the Fetch API
    const createChatCompletionRes = await fetch(
      createChatCompletionEndpointURL,
      {
        method: "POST",
        headers: {
          "Content-Type": "application/json",
          Authorization: "Bearer " + process.env.OPENAI_API_KEY,
        },
        body: JSON.stringify(createChatCompletionReqParams),
      }
    );

    // Processing the response body
    const createChatCompletionResBody =
      await createChatCompletionRes.json();

    // Error handling for the OpenAI endpoint
    if (createChatCompletionRes.status !== 200) {
      let error = new Error(
        "Create chat completion request was unsuccessful."
      );
      error.statusCode = createChatCompletionRes.status;
      error.body = createChatCompletionResBody;
      throw error;
    }

    // Properties on the response body
    const reply = createChatCompletionResBody.choices[0].message;
    const usage = createChatCompletionResBody.usage;

    // Logging the results
    console.log(`Create chat completion request was successful. Results:
Replied message:

${JSON.stringify(reply)}

Token usage:
Prompt: ${usage.prompt_tokens}
Completion: ${usage.completion_tokens}
Total: ${usage.total_tokens}
`);

    // Sending a successful response for our endpoint
    return new Response(JSON.stringify({ reply }), {
      status: 200,
      headers: { "Content-Type": "application/json" },
    });
  } catch (error) {
    // Error handling

    // Server-side error logging
    console.log(`Thrown error: ${error.message}
Status code: ${error.statusCode}
Error: ${JSON.stringify(error.body)}
`);

    // Sending an unsuccessful response for our endpoint
    const reply = {
      role: "assistant",
      content: "An error has occurred.",
    };

    return new Response(JSON.stringify({ error: { reply } }), {
      status: error.statusCode || "500",
      headers: { "Content-Type": "application/json" },
    });
  }
}
Building the frontend
For our frontend, we want a chat UI that enables the user to write and submit messages, send requests containing user-written messages to the backend and receives responses containing replies generated by the ChatGPT API, all the while updating the UI.
The logic of the frontend works as follows:
- We keep track of state variables
messages,newMessageTextandloadingStatus - We define three event handlers:
onChange: UpdatesnewMessageTextas the user types their new messageonSubmit: Triggered when the user submits a new message and sets off logic to update the UI with the user's new message, setloadingStatustotrue, and resetnewMessageTextto the empty stringonKeyDown: Enables response to be submitted using the return key
- We define two
useEffecthooks:
- The first hook is triggered when
loadingStatuschanges. Within this hook, we define and use a functionfetchReplywhich will call our/api/chatendpoint withmessagesas a parameter, return areplygenerated by the OpenAI API, and appropriately update the state variables - The second hook is triggered when
newMessageTextchanges. It is used to automatically adjust the height of the message input box as the user types. This hooks makes use of three refs:textareaRef,backgroundRefandwhitespaceRef
The code for our frontend chat UI
As for the implementation, we first need to install the react-markdown and remark-gfm packages. The OpenAI API uses markdown syntax for code blocks and tables. These packages enable us to parse markdown. Run the following command:
npm install react-markdown remark-gfm
In addition, we patch a bug that will create an unnecessary error message. The bug lies in the sub-dependency debug of the react-markdown package. To resolve the minor bug, we use a fix suggested on a GitHub issue for the bug, specifying a specific version of the supports-color packaged used by debug:
npm install --save-exact supports-color@8.1.1
Then, replace the placeholder content within app/page.js with the following content:
"use client";
import { useState, useEffect, useRef } from "react";
// Used to parse message contents as markdown
import ReactMarkdown from "react-markdown";
import remarkGfm from "remark-gfm";
export default function Home() {
// State variables
const [messages, setMessages] = useState([
{
role: "system",
content: "You are a chatbot that is helpful and replies concisely",
},
]); // An array of the messages that make up the chat
const [newMessageText, setNewMessageText] = useState("");
const [loadingStatus, setLoadingStatus] = useState(false);
// `onChange` event handler to update `newMessageText` as the user types
const onChange = (event) => {
setNewMessageText(event.target.value);
};
// `onClick` event handler to create a new chat
const onClick = () => {
setMessages([
{
role: "system",
content: "You are a chatbot that is helpful and replies concisely",
},
]);
setNewMessageText("");
};
// `onSubmit` event handler fired when the user submits a new message
const onSubmit = async (event) => {
event.preventDefault();
setMessages([...messages, { role: "user", content: newMessageText }]);
setLoadingStatus(true);
setNewMessageText("");
};
// `onKeyDown` event handler to send a message when the return key is hit
// The user can start a new line by pressing shift-enter
const onKeyDown = (event) => {
if (event.keyCode == 13 && event.shiftKey == false) {
onSubmit(event);
}
};
// Effect hook triggered when `loadingStatus` changes
// Triggered on form submission
useEffect(() => {
// Function that calls the `/api/chat` endpoint and updates `messages`
const fetchReply = async () => {
try {
// Try to fetch a `reply` from the endpoint and update `messages`
const response = await fetch("/api/chat", {
method: "POST",
headers: {
"Content-Type": "application/json",
},
body: JSON.stringify({ messages }),
});
const responseBody = await response.json();
const reply =
response.status === 200
? responseBody.reply
: responseBody.error.reply;
setMessages([...messages, reply]);
} catch {
// Catch and handle any unexpected errors
const reply = {
role: "assistant",
content: "An error has occured.",
};
setMessages([...messages, reply]);
}
// Set `setLoadingStatus` to false
setLoadingStatus(false);
};
// `fetchReply` executes only if a new message has been submitted
// `setLoadingStatus(false)` triggers the hook again
// No action occurs the second time because of the condition
if (loadingStatus === true) {
fetchReply();
}
}, [loadingStatus]);
// Logic for auto-adjusting the textarea height as the user types
// Ref variables
const textareaRef = useRef(null);
const backgroundRef = useRef(null);
const whitespaceRef = useRef(null);
// Effect hook triggered when `newMessageText` changes
useEffect(() => {
// Set the textarea height to 0 px for an instant
// Triggers scroll height to be recalculated
// Otherwise, the textarea won't shrink
textareaRef.current.style.height = "0px";
const MAX_HEIGHT = 320;
const HEIGHT_BUFFER = 4;
const VERTICAL_SPACING = 20;
const textareaContentHeight =
textareaRef.current.scrollHeight + HEIGHT_BUFFER;
const textareaHeight = Math.min(textareaContentHeight, MAX_HEIGHT);
textareaRef.current.style.height = textareaHeight + "px";
backgroundRef.current.style.height =
textareaHeight + 2 * VERTICAL_SPACING + "px";
whitespaceRef.current.style.height =
textareaHeight + 2 * VERTICAL_SPACING + "px";
}, [newMessageText]);
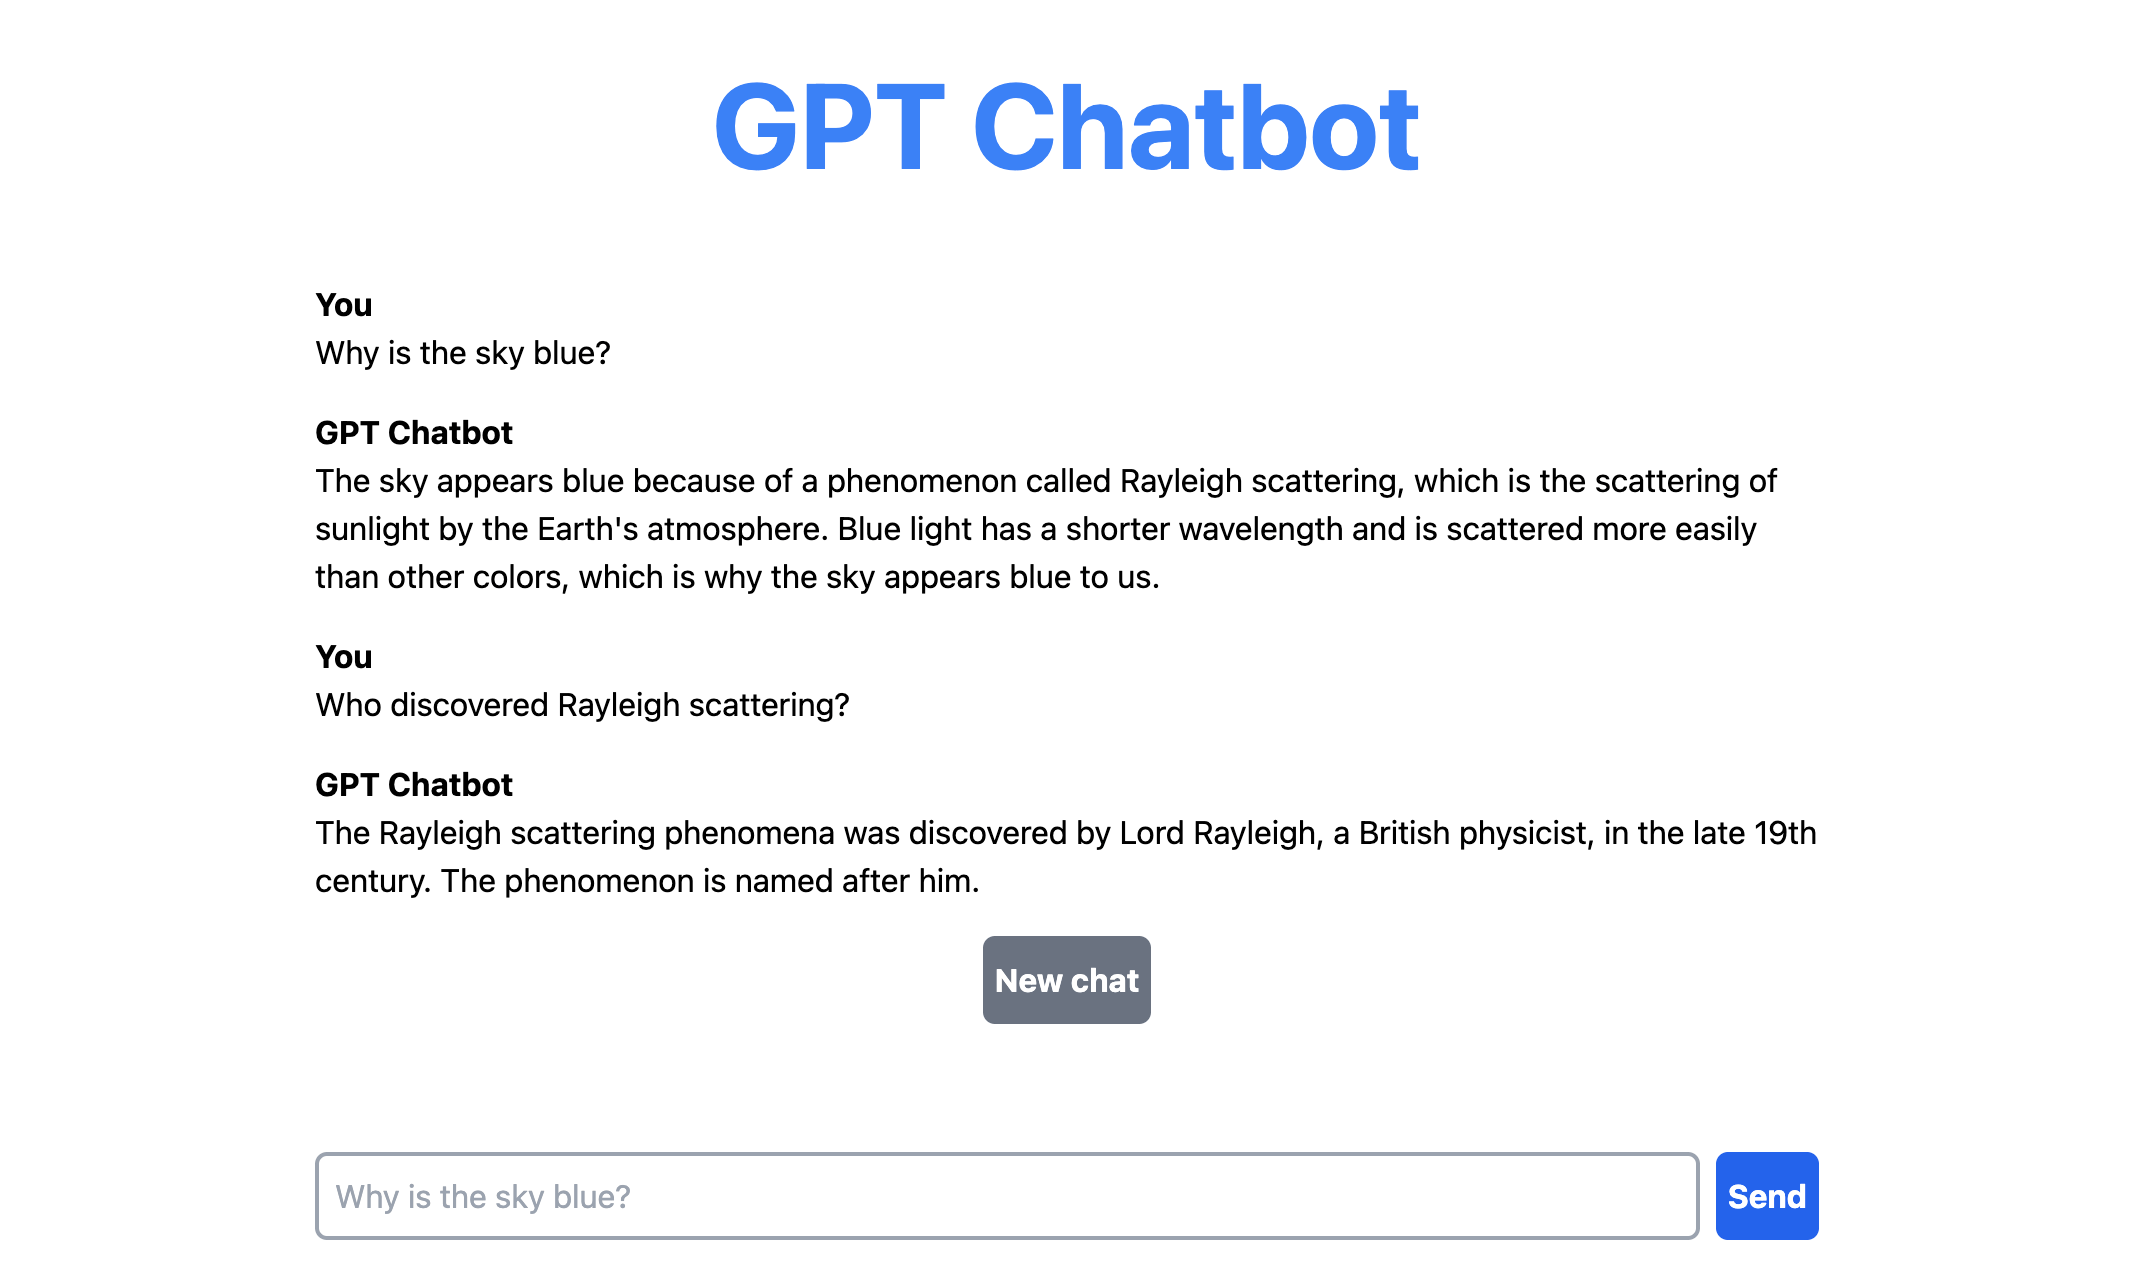
return (
<main className="mx-auto h-screen max-w-full sm:max-w-3xl">
<div className="py-8">
<h1 className="text-center text-6xl font-bold text-blue-500">
GPT Chatbot
</h1>
</div>
{messages.length === 1 && (
<div className="mx-10 mt-20 flex justify-center">
<div>
<p className="mb-2 font-bold">
GPT Chatbot is a basic chatbot built with the OpenAI API,
Next.js and Tailwind CSS
</p>
<p className="mb-32">
To start a conversation, type a message below and hit send
</p>
</div>
</div>
)}
<div>
{messages.slice(1).map((message, index) => (
<div className="mx-2 my-4" key={index.toString()}>
<p className="font-bold">
{message.role === "assistant" ? "GPT Chatbot" : "You"}
</p>
<ReactMarkdown remarkPlugins={[remarkGfm]}>
{message.content}
</ReactMarkdown>
</div>
))}
</div>
{loadingStatus && (
<div className="mx-2 mt-4">
<p className="font-bold">GPT Chatbot is replying...</p>
</div>
)}
{!loadingStatus && messages.length > 1 && (
<div className="mt-4 flex justify-center">
<button
className="h-11 rounded-md border-2 border-gray-500
bg-gray-500 px-1 py-1 hover:border-gray-600
hover:bg-gray-600"
onClick={onClick}
>
<p className="font-bold text-white">New chat</p>
</button>
</div>
)}
<div ref={whitespaceRef} className="z-0"></div>
<div
ref={backgroundRef}
className="fixed bottom-0 z-10 w-full max-w-full bg-white/75
sm:max-w-3xl"
></div>
<div
className="fixed bottom-5 z-20 w-full max-w-full
sm:max-w-3xl"
>
<form className="mx-2 flex items-end" onSubmit={onSubmit}>
<textarea
ref={textareaRef}
className="mr-2 grow resize-none rounded-md border-2
border-gray-400 p-2 focus:border-blue-600
focus:outline-none"
value={newMessageText}
onChange={onChange}
onKeyDown={onKeyDown}
placeholder="Why is the sky blue?"
/>
{loadingStatus ? (
<button
className="h-11 rounded-md border-2 border-blue-400
bg-blue-400 px-1 py-1"
disabled
>
<p className="font-bold text-white">Send</p>
</button>
) : (
<button
className="h-11 rounded-md border-2 border-blue-600
bg-blue-600 px-1 py-1 hover:border-blue-700
hover:bg-blue-700"
type="submit"
>
<p className="font-bold text-white">Send</p>
</button>
)}
</form>
</div>
</main>
);
}
In addition, let's update the metadata specified in layout.js:
import "./globals.css";
import { Roboto_Flex } from "next/font/google";

const robotoFlex = Roboto_Flex({ subsets: ["latin"] });

export const metadata = {
  title: "GPT Chatbot",
  description:
    "GPT Chatbot: A simple ChatGPT-powered chatbot" +
    " built with Next.js and Tailwind CSS",
};

export default function RootLayout({ children }) {
  return (
    <html lang="en">
      <body className={robotoFlex.className}>{children}</body>
    </html>
  );
}
Breaking down our backend endpoint
The HTTP POST method
Our backend API endpoint is accessible through the path /api/chat. Locally, this corresponds to http://localhost:3000/api/chat. Unlike the /api/hello endpoint that we created in Chapter 2, we will set up our /api/chat endpoint to accept HTTP requests with the method POST instead of GET.
We want to accept HTTP POST requests as for the /api/chat endpoint we want to take the latest message written by the user and previous messages in the conversation and return a generated reply. Therefore, we want these messages to be contained on the request body, in which case convention directs us to use the POST method.
When using the Next.js App Router, to create a backend endpoint that accepts HTTP POST requests we define a function POST that accepts a Fetch API request object, req, as an argument.
Having done this, if our endpoint receives an HTTP request that has a method different to POST such as GET or PUT, then our app will throw an error with the method not allowed HTTP status code 405.
The messages parameter
As in the previous chapter, we use the try-catch pattern to implement our /api/chat endpoint. We expect the requests sent to it to contain a body with JSON data specifying one parameter: messages, an array of messages.
For our web app, messages will have the follow format:
- The first message will be a
systemmessage specifying the kind of responses we expect the ChatGPT API to generate. We won't show this message to the user on the frontend - The second message will be a
usermessage corresponding to the first message written by the user. - The third message will be an
assistantmessage corresponding to the reply generated by the ChatGPT API - The next message will again be a
usermessage written by the user. As the conversation continues, subsequent elements ofmessageswill continue to be anassistantmessage generated by the ChatGPT API followed by ausermessage written by the user and so on
For example, in our web app, messages would look like this after the user submits their first message:
{
  "messages": [
    {
      "role": "system",
      "content": "You are a chatbot that is helpful and replies concisely"
    },
    {
      "role": "user",
      "content": "Why is the sky blue?"
    }
  ]
}
Sending our request to the ChatGPT API
When it comes to sending our request to the ChatGPT API, we again use the Fetch API. When using the fetch method, we specify the following:
- The create chat completion endpoint URL:
https://api.openai.com/v1/chat/completions - The method of the request:
POST - The headers of the request: This includes specifying our OpenAI API key via environment variables,
process.env.OPENAI_API_KEY, as well as the commonapplication/jsoncontent type - The body of the request: We specify the desired model,
gpt-3.5-turbo, and directly pass inmessages, as it is already in the required format
Processing the response body
To process the response, we extract the JSON body of the response and store it in a JavaScript object createChatCompletionResBody.
We then check if the status code is the success code 200. If it isn't, then we throw an error. Otherwise, we store the generated message and usage data in variables reply and usage, respectively.
Following this, we use the reply and usage variables to log the reply and usage data in the server-side console.
Finally, we return a response for our endpoint with the following properties:
- Body: The response has a JSON body with a single property given by the variable
reply - Status code: The response has the success HTTP status code
200 - Content type: The response has its
"Content-Type"specified as"application/json"
Error handling for the OpenAI endpoint
If an error is thrown in the try block, then we log the message, status code and body of the error on the server side.
Following that, we return a response for our endpoint with the following properties:
- Body: The response has a JSON body with a single property given by the variable
reply. The value ofreplyis anassistantmessage specifying thatAn error has occurred. - Status code: The response has a HTTP status code that mirrors the status code on the response returned by OpenAI's servers, if it is defined. Otherwise, if
error.statusCodeis undefined, then we set the status code as the unexpected error code500 - Content type: The response has its
"Content-Type"specified as"application/json"
Breaking down the frontend chat UI
The "use client" directive
As for the project in the previous chapter, we would like to use React state and lifecycle effects in the logic for our UI in app/page.js. Therefore, on the first line of page.js we add the client directive "use client" to declare our page as a Client Component.
What we import
To build our frontend UI, we import a number of exports:
useState,useEffectanduseReffromreact: These are the React hooks we use to make our UI dynamicReactMarkdownfromreact-markdown: This is a component that we can use to parse and render markdown on our frontendremarkGfmfromremark-gfm: This is a plugin forReactMarkdownthat adds support for GitHub Flavored Markdown (GFM), which extends markdown to support tables, task list items and other features. We are particularly interested in support for tables, as OpenAI's ChatGPT models writes tables in this format
State variables: messages, newMessageText and loadingStatus
We define three state variables for our frontend UI: messages, newMessageText and loadingStatus.
messages state variable
The first of these is messages, which is an array of messages. In our web app, messages will reflect all the messages in a conversation. We will add new user-written messages to it, pass it as a parameter on requests to the /api/chat endpoint, and update it with the reply generated by the ChatGPT API. To update messages, we will use the associated state hook setMessages.
newMessageText state variable
The second state variable that we define is newMessageText, which will be a string with the initial value being the empty string. This will be used to keep track of the text the user types into the message submission box. We update newMessageText using the state hook setNewMessageText.
loadingStatus state variable
The third state variable that we define is loadingStatus, which will be a boolean value with the initial value being false. The value of loadingStatus will be set to true when the user submits a new message. It will again be set as the value false when the logic to generate a reply concludes, whether successfully or not. We use the state hook setLoadingStatus to update loadingStatus.
Event handlers
We define four event handlers for our frontend UI: onChange, onSubmit, onKeyDown and onClick.
onChange event handler
This event handler will be triggered each time the user types in the new message submission component, calling the state hook setNewMessageText each time. It will ensure that newMessageText exactly reflects the users inputted text.
onSubmit event handler
We will use a form element to implement the new message submission component. As the onSubmit attribute for this form element, we use our event handler of the same name.
In the event handler, as is often the case, we prevent the default behaviour associated with form submission by invoking the event method event.preventDefault().
Following this, we update the messages state variable using the setMessages stake hook by appending the user's submitted message: The user message whose content is given by the state variable newMessageText.
To trigger the logic to generate a reply by sending a request to /api/chat, we set loadingStatus to true by calling setLoadingStatus(true). This will trigger a useEffect hook to send a request to /api/chat (more on this shortly).
At this point, it makes sense to clear the new message submission component. Therefore, we call /api/chat.
onKeyDown event handler
Our new message submission component has a submit button, the Send button. But we also want the user to be able to submit a new message by pressing the enter key. The onKeyDown event handler enables this. It is specified on the attribute of the same name on the textarea element of our form element that makes up the new message submission component.
Each time the user types in textarea, the onKeyDown event handler will check the user's keyboard actions. If the enter key has been pressed (event.keyCode == 13) and the shift key hasn't been pressed at the same time (event.shiftKey == false), then the onSubmit event handler will be triggered.
In this way, the user can still create new lines in the textarea using by hitting shift-enter.
onClick event handler
In our web app, we have a New chat button, which will clear the current conversation. We implement this by specifying an onClick event handler for the attribute of the same name on the New chat button's button element.
When onClick is called, we use setMessages to reset the state variable messages to be the array of messages containing only the system message. In addition, we clear the textarea of the new message submission component by calling setNewMessageText("").
useEffect hooks
For our frontend UI, we define two useEffect hooks. The first useEffect is used to generate a reply by sending a request to the /api/chat endpoint. The second useEffect hook is used to enable our new message submission form's textarea element to automatically increase and decrease in height as the user's typing leads to new lines being added or existing lines being deleted.
Generating replies with useEffect
The dependency array
The dependency array of this useEffect hook has one variable: loadingStatus. Therefore, the hook is triggered whenever the setLoadingStatus hook is used to toggle the boolean-valued variable loadingStatus.
The fetchReply helper function
In our useEffect hook, we define a function fetchReply. Using the try-catch pattern, in the try block we use the Fetch API to send a request to the /api/chat endpoint. Using the fetch method, we specify the request as follows:
- The
/api/chatendpoint URL:/api/chat - The method of the request:
POST - The headers of the request: We specify the content type as
application/json - The body of the request: We send a JSON payload containing
messages
Following this, we process the JSON body of the response and store it in the JavaScript object responseBody.
To extract the reply from responseBody, we check the status field of the responseBody. This corresponds to the status code of the response. If the status code is 200, then we know the reply has successfully been generated, meaning responseBody.reply is non-null and we can set is as reply. Otherwise, we know the /api/chat entered its error-handling logic and the reply has not been successfully generated. In this case, we set reply as the error reply: responseBody.error.reply.
Following this logic, we use the setMessages hook to append reply to messages.
In the catch block, we handle unexpected errors. In this case, we append an assistant message with the contents An error has occured.
Outside of the try and catch blocks, we conclude fetchReply by using the setLoadingStatus hook to set loadingStatus to false: setLoadingStatus(false),
The logic for our useEffect hook
Almost all of the actual logic for our useEffect hook occurs in the helper function fetchReply.
But notice that fetchReply toggles loadingStatus to false. Since loadingStatus is in the dependency array of our useEffect hook, this will trigger our hook to be called again. This is undesirable as we only want to call fetchReply when loadingStatus is true and we want to avoid the risk of an infinite loop. Therefore, we place our call to fetchReply within a conditional block that is only entered if the statement loadingStatus === true is true.
Using useRef
We define three ref variables: textareaRef, backgroundRef and whitespaceRef, with the initial value null.
We use these ref variables to manipulate elements in the DOM. To do so, we assign the ref attribute of an element or component one of these ref variables. Then, we can access the element or component through the ref variable.
In our case, we assign the new message submission form's textarea the ref variable textareaRef. Behind our new message submission component, we have a div element used to create an opaque background, which we assign the ref variable backgroundRef. We also have a div purely used to create whitespace, which we assign the ref variable whitespaceRef.
A dynamic textarea with useEffect
The purpose of this second useEffect hook is to enable our new message submission form's textarea element to automatically increase and decrease in height as the user's typing leads to new lines being added or existing lines being deleted.
The dependency array
The dependency array of this useEffect hook has one variable: newMessageText. Therefore, the hook is triggered whenever the user types into the textarea element.
The scrollHeight property
To achieve this, we take advantage of the textarea element's scrollHeight property. The scrollHeight value corresponds to the height that is required for the textarea element to display all of its contents without a vertical scrollbar.
The logic for our useEffect hook
We begin by setting the height of the textarea to 0px for only an instant. We can do this through the textareaRef variable: textareaRef.current.style.height = "0px".
This ensures the scroll height of the textarea is correctly recalculated. Without it, the textarea won't shrink if, for example, the user deletes a line.
Next, we define three constants:
MAX_HEIGHT: This is the maximum height of the textarea. We set this to be320pixels. If the height of the contents of the textarea exceeds this height, then a scrollbar will appear. This way, if the message the user is typing is long, it will not obscure the whole viewportHEIGHT_BUFFER: This is vertical buffer of4pixels to ensure a scrollbar does not appear. If the height of the textarea is exactly equal to the scroll height, then a scrollbar that allows only tiny amounts of vertical movement may appear. Adding some buffer ensures this does not occurVERTICAL_SPACING: This is additional vertical spacing of20pixels that we use to adjust the background elements: The twodivelements with refsbackgroundRefandwhitespaceRef. We would like the height of these background elements to exceed the height of the textarea
Following this, we calculate the desired value of textareaContentHeight as the sum of the scroll height (textareaRef.current.scrollHeight) and height buffer constant (HEIGHT_BUFFER),
The actual textareaHeight is then calculated as the minimum of the textareaContentHeight and MAX_HEIGHT using the Math.min method.
Finally, we use our ref variables to update the heights of the textarea and two background div elements:
- We set the height of the
textareaelement astextareaHeight - We set the height of the two background
divelements astextareaHeightplus doubleVERTICAL_SPACING(upper plus lower spacing)
Structure of our main element
The main element contains the primary content of our web app. We style it as follows using Tailwind CSS:
mx-auto: This centers the container horizontally in the pageh-screen: The height of the container will be the height of the screen of the device the user is usingmax-w-fullandsm:max-w-3xl: On mobile devices, we want to use the full horizontal width of the screen. On devices with larger screens, we limit the width to bemax-w-3xl. Here,smcorresponds to the "small" screen breakpoint of640px
h1 for our web app
Here, we insert the name for our web app: GPT Chatbot We add some HTML and CSS to position the element appropriately and make it stand out.
Welcome text
When the web app first loads, we want to show the user some welcome text. This welcome text tells the user useful information about the web app that they're using. At the same time, we wouldn't want to show the user simply a blank screen or show the or the New chat button when they have first opened the web app.
We make use of conditional rendering. By default, the messages state variable is an array containing a single message: the system message. Therefore, if messages has length 1 (messages.length === 1), then we show the user welcome text.
As for why the New chat button does not appear, we will discuss that shortly.
Rendering messages
Next, we want to render the content of messages. To do this, we want to iteratively render each of the messages in messages.
slice array method
First, we do not want to render the first message of messages. This is the system message and we leave it to be set by the developer on the backend. Therefore, we use the method call messages.slice(1) to return the array corresponding to messages, but excluding the first element.
map array method
Next, to iteratively render each of the messages in messages.slice(1), we use the array map method. The map method returns the array whose elements correspond to the results of applying a specified function to each element of the calling array.
We want the specified function to return a component. In this way, React is able to render the array of components, one after another.
Rendering each element of messages
Now, each message has two properties: role and content. We use role to render the sender of each message in the conversation. If the role is assistant, then we render the sender as GPT Chatbot. If it isn't (this means it's user), then we render the sender as You. This text is displayed in a p element.
As for the content property, this will correspond to markdown content. To render it, we need to wrap message.content in the ReactMarkdown component that we imported.
In addition, on the ReactMarkdown component, we specify the remarkPlugins attribute with the value [remarkGfm], referencing the remarkGfm plugin that we imported. This way, we will also be able to render any tables that the ChatGPT API has generated for us.
A simple loading indicator
We implement a simple loading indicator. If loadingStatus is true, then we render the text GPT Chatbot is replying....
New chat button
The New chat button is rendered only when loadingStatus is false and the length of messages is greater than 1 (messages.length > 1). This means that the New chat button isn't shown when the web app first loads.
We style a grey button and as the onClick attribute specify our event handler of the same name.
New message submission component
The new message submission component consists of three layers, which we arrange using the z-index CSS property. This approach is necessary as we implement the new message component such that it is fixed to the bottom of the viewport. Therefore, a user can see and write their latest message while scrolling through any part of a long conversation.
Whitespace component
As our base layer (z-0), we have an empty unstyled div whose height is specified in our second useEffect hook. This ensures that when we scroll to the bottom of a long conversation, we can see the full contents of the conversation and no message contents is covered by the background component and form component, which sit in higher layers along the z-index.
Background component
As the next layer (z-10), we have an empty styled div whose height is specified in our second useEffect hook. This div is fixed to the bottom of the viewport. We make it opaque using the utility class bg-white/75. So, when the user scrolls through a long conversation, the text behind the new message component will be blurred. The user will know the text is there, but it will not be distracting.
New message submission form
As the highest layer (z-20), we have a div containing a form element. This div is fixed to the bottom of the viewport.
We make the form element a flex container using the utility class flex. The flex container consists of two elements, a textarea and a button. For the onSubmit attribute, we use the event handler of the same name.
For the textarea, we specify a number of attributes:
ref: This is set to betextareaRefvalue: This corresponds to the text inside thetextarea. We set it to benewMessageTextonChange: This is the event handler that is called whenever the user types to change the contents of thetextarea. We set it to be the event handler of the same nameonKeyDown: This is event handler that is called whenever the user types. We set it to be the event handler of the same nameplaceholder: This text is shown in the background of thetextareawhen the user has not yet focussed on it. We display the textWhy is the sky blue?
For the Send button, we make use of conditional rendering. If loadingStatus is false, we render a button that has submit as its type. Otherwise, we render a button that has the boolean attribute disabled. This way, the user can only send a single message at a time.
That's all there is to it. At this point you should have a basic chatbot built with the OpenAI ChatGPT API, Next.js and Tailwind CSS running locally.
Summary and next steps
In this chapter, we built a chatbot powered by OpenAI's ChatGPT API. We covered the following topics:
- Writing a ChatGPT-powered endpoint that takes an array of messages and generates a reply
- Building a chat UI with Next.js and Tailwind CSS using React's
useState,useEffectanduseRefhooks
Like in the previous chapter, this project can readily be adapted to pursue your own ideas. Here, experimenting with different system messages is a natural starting point.
Conclusion
This book has covered the basics of building fullstack AI web apps with the OpenAI API, Next.js and Tailwind CSS. While this book has only scratched the surface of the new possibilities OpenAI has unlocked for fullstack web development, I hope that you've enjoyed this book and feel inspired to pursue your own project ideas using some of the skills that you've picked up in this book.