Hello, GPT: Building a simple web app with OpenAI's ChatGPT API
In this chapter, we build a simple "Hello, World!"-inspired web app powered by OpenAI's ChatGPT API with Next.js and Tailwind CSS.
You can try the version hosted on Vercel (the awesome cloud computing company founded by the creators of Next.js) here: https://bonjour-gpt.vercel.app/.
The full source code for the web app and quickstart instructions can be found on GitHub: https://github.com/david-j-wu/hello-gpt/tree/v1.0.0.
The plan for this chapter
While building this web app, we will cover the basics of working with and understanding OpenAI's ChatGPT, including accessing the OpenAI API, the GPT models OpenAI offers, the create chat completion endpoint and tokens.
On the backend, we'll cover how to create an API endpoint in Next.js using the Pages Router. And on the frontend, we'll build a simple interactive frontend UI.
Using our "Hello, World!" web app as a starting point
As the starting point for our project, we use the "Hello, World!" web app with Next.js and Tailwind CSS that we built in the last chapter.
If you want to get started right away, the project files are also available as a public repository on GitHub (released under the MIT License): https://github.com/david-j-wu/hello-world-nextjs-tailwind-css/tree/v1.0.0.
To proceed with a cloned repository, first cd into the parent folder (i.e., projects) in which you would like to create your project folder. Then, to create the project files, copy-and-paste the following commands into the terminal and execute them:
git clone -b v1.0.0 https://github.com/david-j-wu/hello-world-nextjs-tailwind-css hello-gpt
cd hello-gpt
git checkout -b main
git remote remove origin
If you are using a cloned version of this web app, then your project files may not include the node_modules folder. If this is the case, simply run npm install. Then run npm run dev to launch the web app locally.
Additional resources
Before we progress further, there are several resources that could be of interest as you work through the material here.
If you'd like to understand something about the OpenAI API better, then the most authoritative, up-to-date reference is the official docs: https://platform.openai.com/docs. Similarly so for understanding the ins-and-outs of Next.js: https://nextjs.org/docs. And the same goes for Tailwind CSS: https://tailwindcss.com/docs.
For improving your understanding of the fundamentals of HTML, CSS and JavaScript more generally, it's hard to beat MDN Web Docs: https://developer.mozilla.org/.
In addition, OpenAI has released an example Next.js web app pet name generator, openai-quickstart-node, under the MIT License using the API for the GPT 3.5 model text-davinci-003. Here, we use the API for the newer GPT 3.5 model gpt-3.5-turbo, which is the same model used in ChatGPT and 10-times cheaper than the text-davinci-003 model. With the caveat that the model used is different, the project is a fantastic learning resource: https://github.com/openai/openai-quickstart-node.
Of course, if there's anything that you'd like to understand better, you could also ask ChatGPT: https://ai.com/.
Accessing the OpenAI API
Signing up for the OpenAI API
Direct access to OpenAI's models via API are available through OpenAI and Microsoft Azure. The fastest way to get started is through OpenAI. But depending on your usecase, particularly if you need enterprise-grade security, compliance or regional availability, Azure could be a more suitable option.
Here, we access OpenAI's models through OpenAI's services.
To access the OpenAI API, head over to the landing page for OpenAI's products and sign up for an account if you don't already have one by clicking "Get started": https://openai.com/product.
API keys
After creating your account and setting up your billing details, go to the API Keys page: https://platform.openai.com/account/api-keys
To use OpenAI's API in web apps we build, we will use a secret key so that our web app can send requests to OpenAI's services.
Click the button labelled "Create new secret key". A modal should appear containing a generated secret key. Once you close the modal, you won't be able to see the key again, so be sure to securely store the key if you will need further reference to it.
Having said that, you can create and revoke (delete) keys as you like, so it's not the end of the world if you forget a key.
Keep your API key secret
When building web apps, it is important we heed OpenAI's advice:
Do not share your API key with others, or expose it in the browser or other client-side code.
To avoid this advice is to risk someone using a key tied to your account to run up a large bill or otherwise do bad things.
Environment variables in Next.js
The gist of environment variables
We will store our OpenAI API secret key in an environment variable.
Environment variables are text key-value pairs that are stored in a file as part of our project files, but separate from the logic of our web app.
Typically, the file has a name like .env or an environment-specific name like .env.local, .env.development or .env.production. These files usually live in the parent directory of our project, rather than a subdirectory.
It's best practice to store data like API keys in an environment variable, rather than directly embedding them in our logic.
We use environment variables in the following way. Suppose we have a file called .env with the following key:
KEY=NAME
Then we can load the key in our code as follows:
const key = process.env.KEY
The variable key would be a string with the value "NAME".
Environment variables in Next.js
In Next.js, when writing code that is deployed locally, rather than deployed in production on a live server, environment variables are stored in a file named .env.local located in our parent project directory.
And as environment variables are often used to store secrets, our project's .gitignore file includes the line .env*.local so that we won't accidentally upload our .env.local file and all of its secrets into a remote repository.
Importantly, environment variables that aren't prefixed with NEXT_PUBLIC_ won't be exposed to the browser.
Creating a .env.local file for our project
Let's store an OpenAI API key in an environment variable for our project. Create the file .env.local in your project directory. For example, if your project is called hello-gpt, create the file hello-gpt/.env.local.
As we discussed earlier, generate a new secret key on the OpenAI website and copy its content into your clipboard. Let's suppose the key is my-openai-api-key-1. (Realistically, it will be a long, random sequence of numbers and letters.)
Then populate .env.local with the following content
OPENAI_API_KEY=my-openai-api-key-1
Now, in our web app, we can access our secret key through process.env.OPENAI_API_KEY.
Writing an API endpoint powered by the ChatGPT API
The code for our ChatGPT-powered endpoint
Let's write a ChatGPT-powered endpoint for our web app. Let's replace the contents of app/api/hello/route.js with the following content, which is the complete logic for our endpoint:
export const dynamic = "force-dynamic";

// Logic for the `/api/hello` endpoint
export async function GET() {
  try {
    // Sending a request to the OpenAI create chat completion endpoint

    // Setting parameters for our request
    const createChatCompletionEndpointURL =
      "https://api.openai.com/v1/chat/completions";
    const promptText = `Write five variations of "Hello, World!"

Start each variation on a new line. Do not include additional information.

Here is an example:

Hello, World!
Bonjour, Earth!
Hey, Universe!
Hola, Galaxy!
G'day, World!`;
    const createChatCompletionReqParams = {
      model: "gpt-3.5-turbo",
      messages: [{ role: "user", content: promptText }],
    };

    // Sending our request using the Fetch API
    const createChatCompletionRes = await fetch(
      createChatCompletionEndpointURL,
      {
        method: "POST",
        headers: {
          "Content-Type": "application/json",
          Authorization: "Bearer " + process.env.OPENAI_API_KEY,
        },
        body: JSON.stringify(createChatCompletionReqParams),
      }
    );

    // Processing the response body
    const createChatCompletionResBody =
      await createChatCompletionRes.json();

    // Error handling for the OpenAI endpoint
    if (createChatCompletionRes.status !== 200) {
      let error = new Error(
        "Create chat completion request was unsuccessful."
      );
      error.statusCode = createChatCompletionRes.status;
      error.body = createChatCompletionResBody;
      throw error;
    }

    // Properties on the response body
    const completionText =
      createChatCompletionResBody.choices[0].message.content.trim();
    const usage = createChatCompletionResBody.usage;

    // Logging the results
    console.log(`Create chat completion request was successful. Results:
Completion:

${completionText}

Token usage:
Prompt: ${usage.prompt_tokens}
Completion: ${usage.completion_tokens}
Total: ${usage.total_tokens}
`);

    // Sending a successful response for our endpoint
    return new Response(JSON.stringify({ completion: completionText }), {
      status: 200,
      headers: { "Content-Type": "application/json" },
    });
  } catch (error) {
    // Error handling

    // Server-side error logging
    console.log(`Thrown error: ${error.message}
Status code: ${error.statusCode}
Error: ${JSON.stringify(error.body)}
`);

    // Sending an unsuccessful response for our endpoint
    return new Response(
      JSON.stringify({ error: { message: "An error has occurred" } }),
      {
        status: error.statusCode || "500",
        headers: { "Content-Type": "application/json" },
      }
    );
  }
}
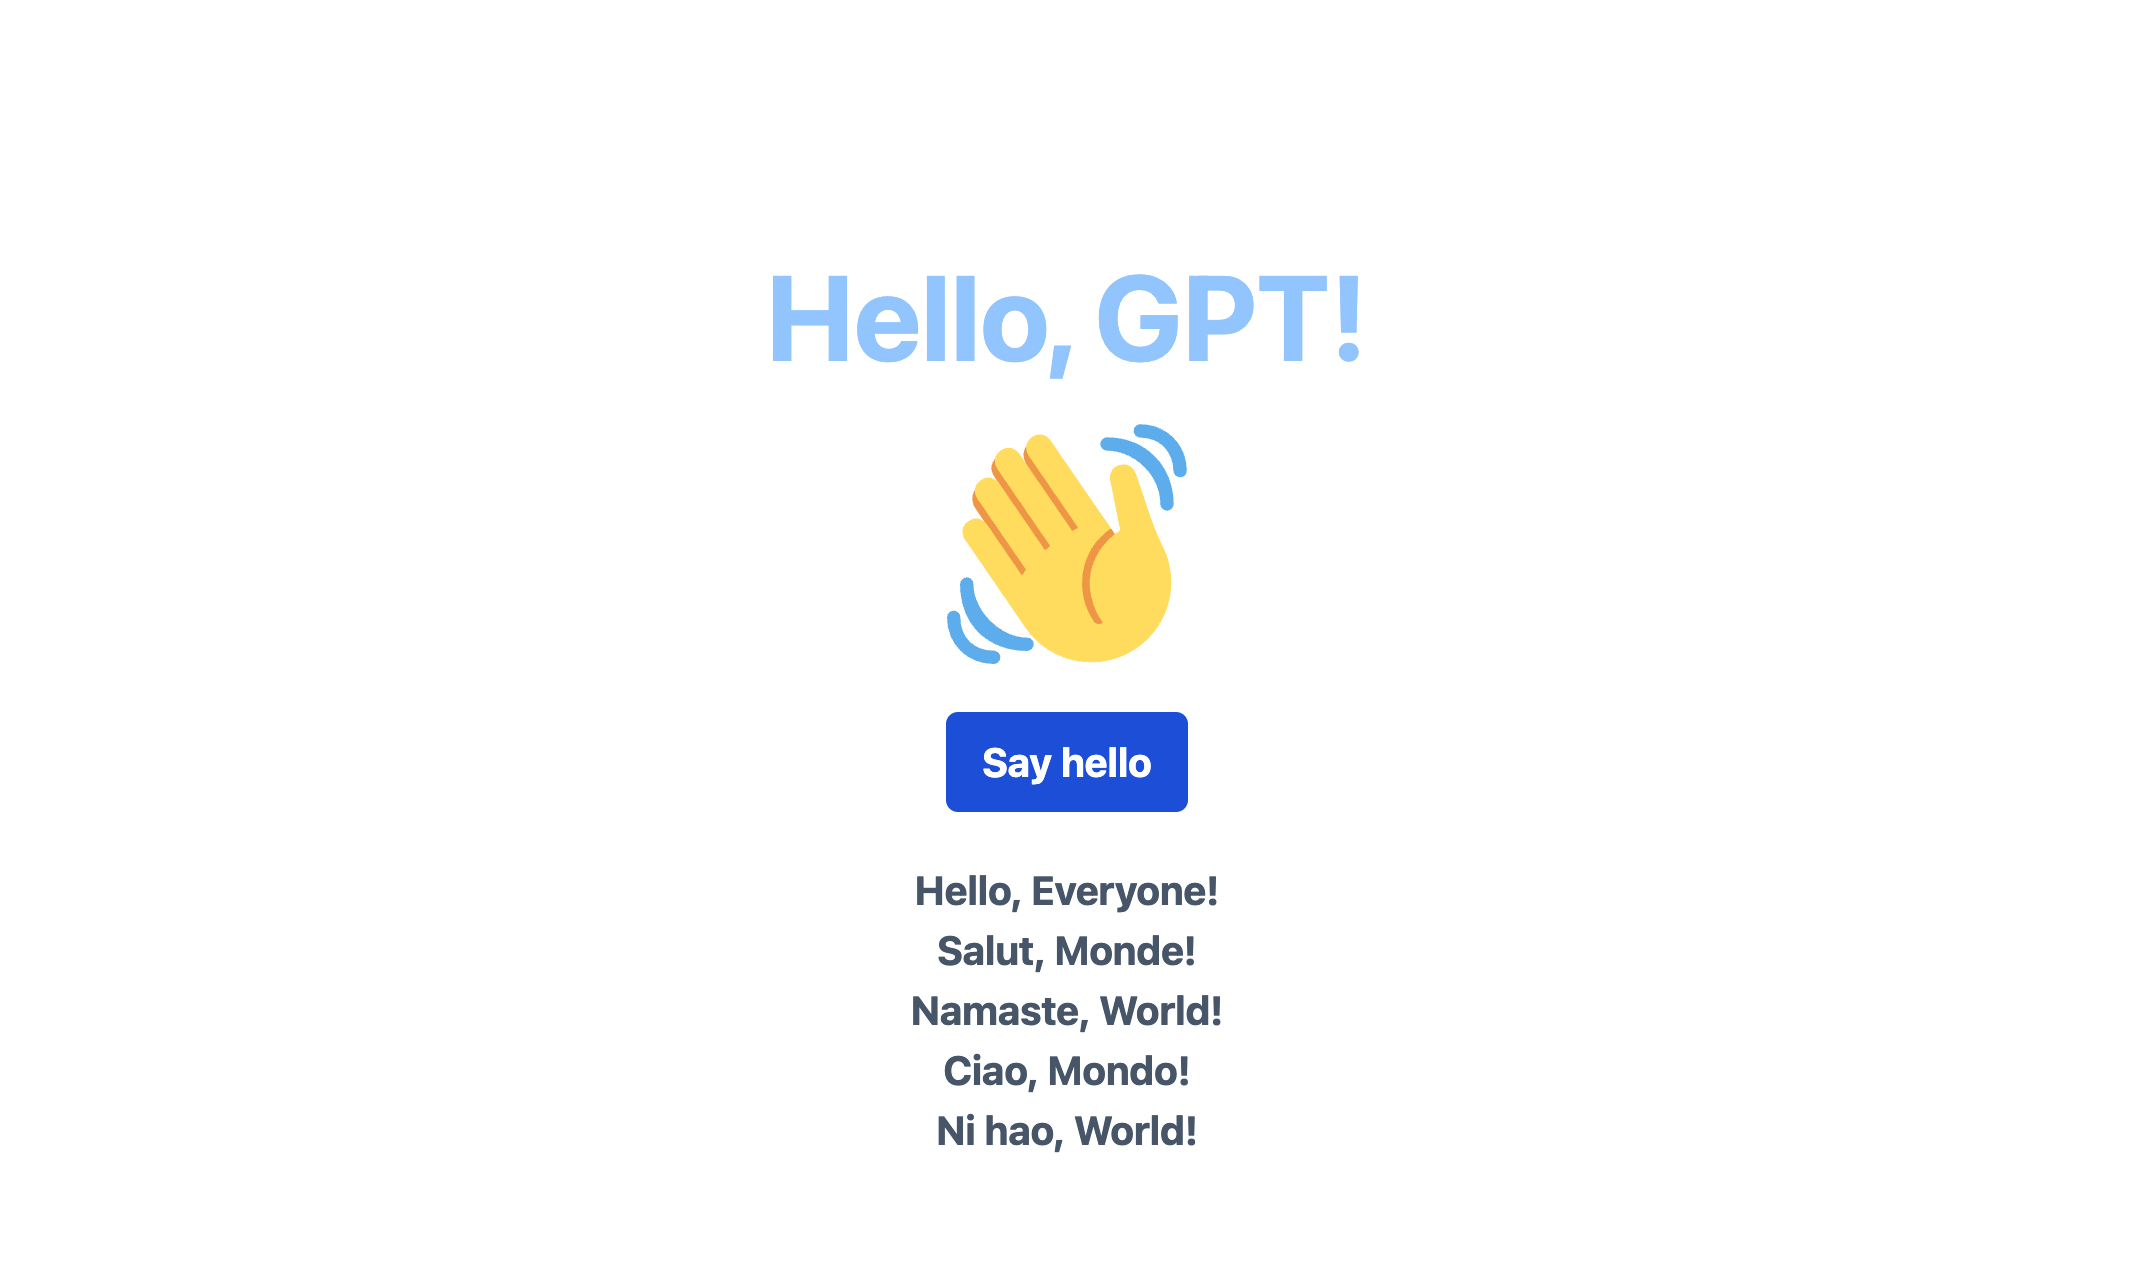
If you visit http://localhost:3000/api/hello, then you will see something like this, which is a variation of "Hello, World!" generated by ChatGPT:
{
  "completion": "Hi, Planet!\nYo, Globe!\nGreetings, Cosmos!\nAloha, Solar System!"
}
And if you refresh the page, you will see different variations of this well-known phrase.
That handles the backend for our web app. Next, we'll take a look at the code for building a simple frontend UI for our web app.
A simple frontend UI for our web app
In this section, we walk through the code and steps for putting together a simple frontend UI for our web app.
The code for our frontend UI
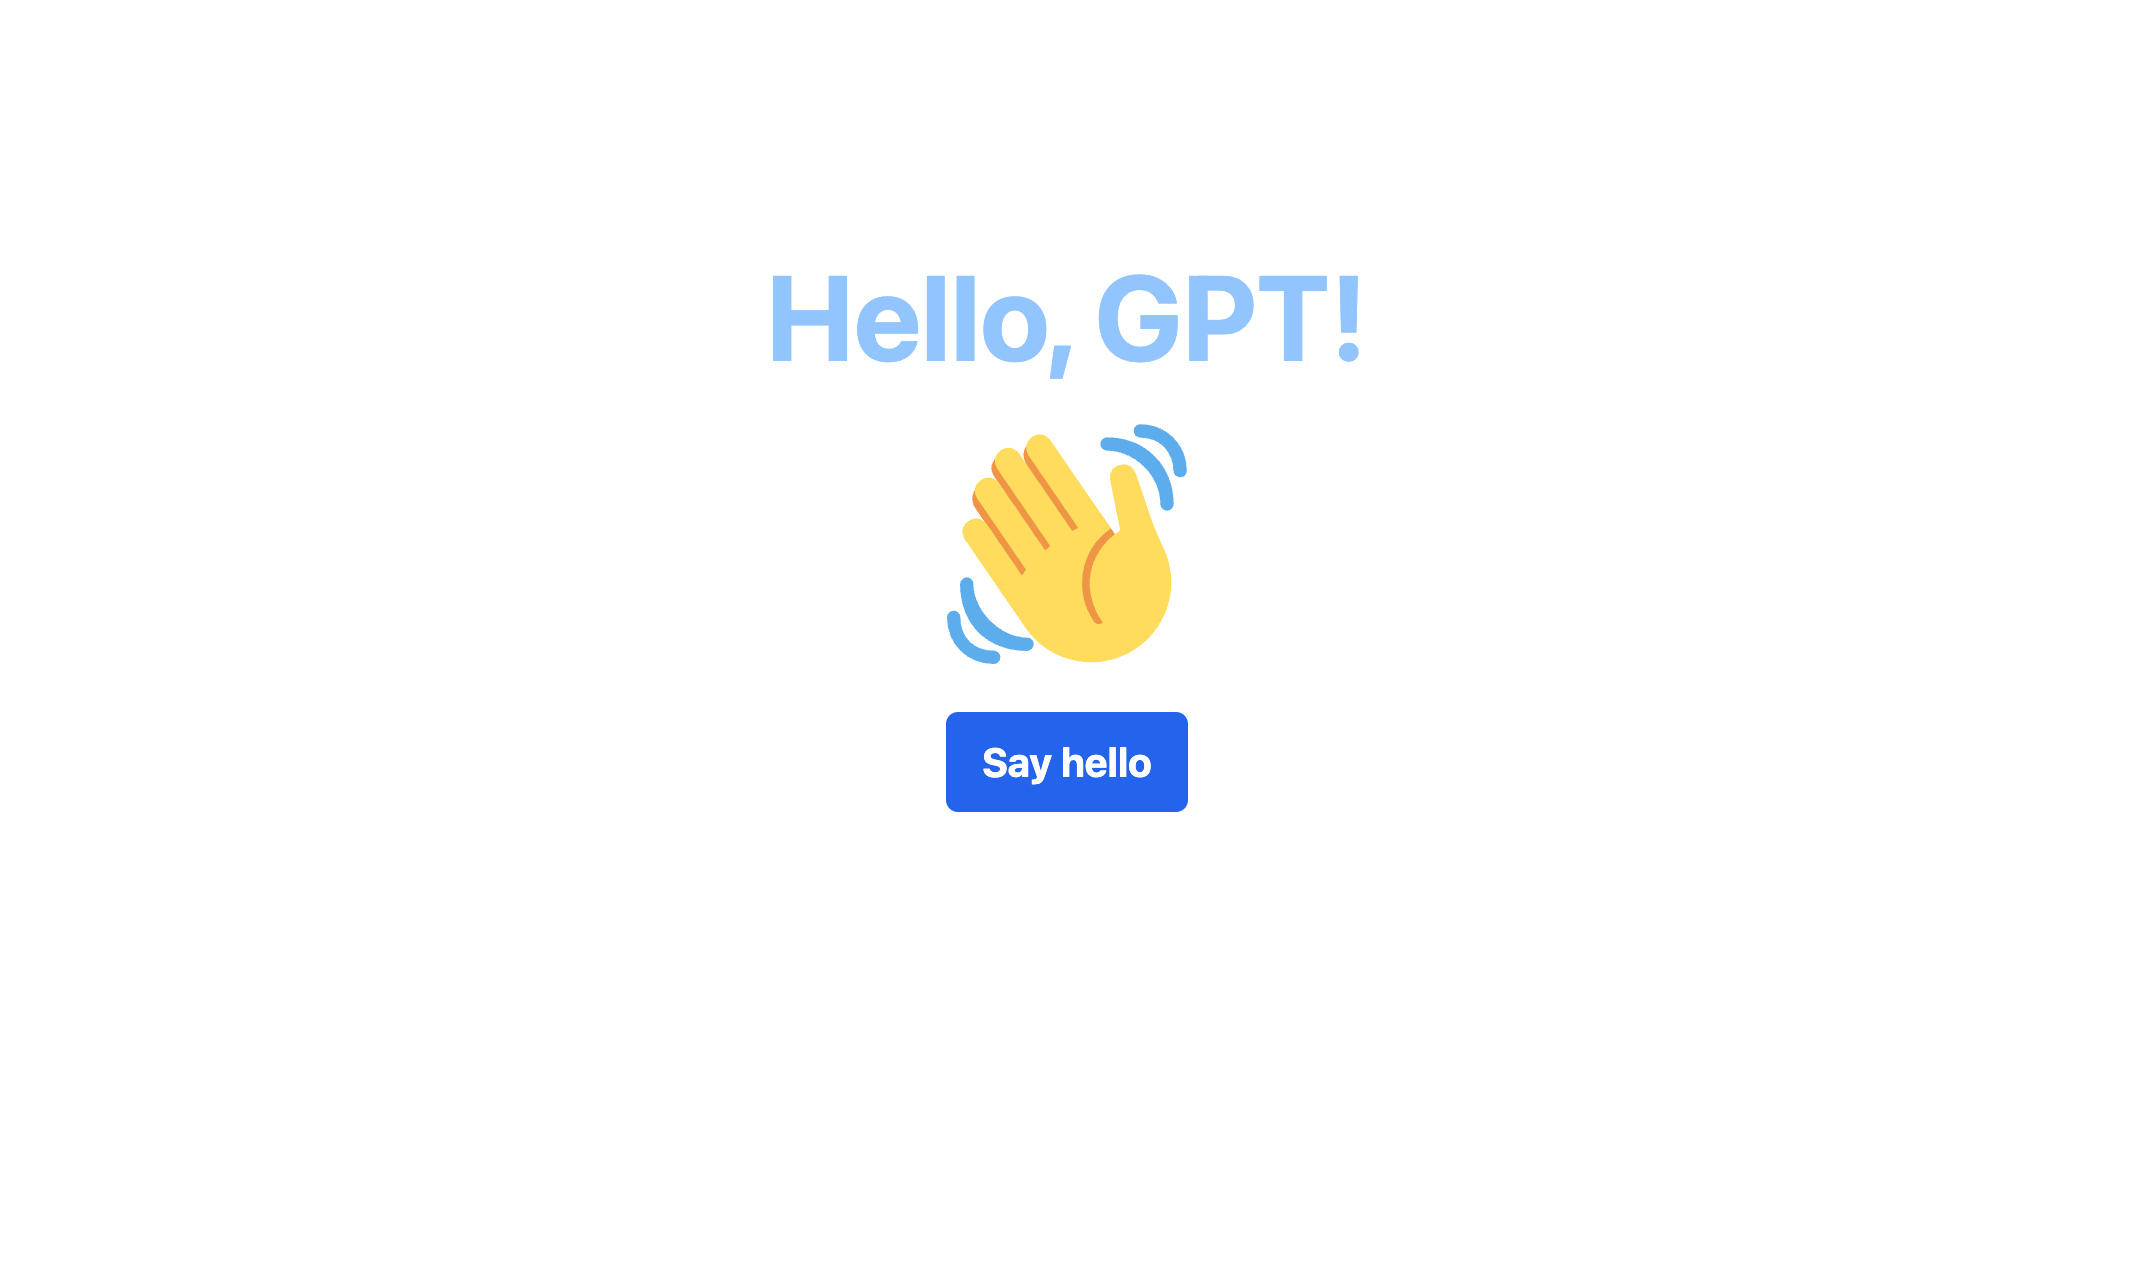
At present, if you open http://localhost:3000/ in your browser, you'll simply see the following text: "Hello, World!"
This corresponds to the page file app/page.js in our project. At present, it has the following contents:
We're going to build our frontend in three steps:
- Add the contents of
app/page.js - Add the contents of
app/layout.js - Place the necessary images we need for
app/page.jsinto ourpublicfolder
First, let's replace the contents of app/page.js with the code for our desired frontend:
"use client";

import Image from "next/image";
import { useState } from "react";

export default function Home() {
  // Defining state hooks
  const [reply, setReply] = useState("");
  const [loadingStatus, setLoadingStatus] = useState(false);

  // Making a client-side request to our endpoint
  async function onSubmit(event) {
    event.preventDefault();
    setLoadingStatus(true);
    try {
      const response = await fetch("/api/hello");
      const body = await response.json();

      setReply(
        response.status === 200 ? body.completion : body.error.message
      );
    } catch {
      setReply("An error has occurred");
    }
    setLoadingStatus(false);
  }

  // Creating the UI
  return (
    <main className="mx-auto flex h-screen max-w-xs flex-col">
      <div className="mt-32">
        <h1 className="text-center text-6xl font-bold text-blue-300">
          Hello, GPT!
        </h1>
      </div>
      <div className="mx-auto my-6">
        <Image
          src="waving-hand.svg"
          width={120}
          height={120}
          alt="A cartoon drawing of a waving hand"
          priority
        />
      </div>
      <div className="mx-auto">
        <form onSubmit={onSubmit}>
          <button
            className="mb-3 rounded-md border-2 border-blue-600 bg-blue-600
              px-4 py-2 hover:border-blue-700 hover:bg-blue-700"
            type="submit"
          >
            <p className="text-[20px] font-bold text-white">Say hello</p>
          </button>
        </form>
      </div>
      {loadingStatus ? (
        <div className="mx-auto mt-3">
          <Image src="three-dots.svg" width={60} height={15} />
        </div>
      ) : (
        <div className="mt-3">
          <p
            className="whitespace-pre-line text-center text-[20px]
              font-bold text-slate-600"
          >
            {reply}
          </p>
        </div>
      )}
    </main>
  );
}
Next, let's update app/layout.js. All we want to do is update the metadata for our web app. Let's update the content of app/layout.js as follows:
import "./globals.css";
import { Roboto_Flex } from "next/font/google";

const robotoFlex = Roboto_Flex({ subsets: ["latin"] });

export const metadata = {
  title: "Hello, GPT!",
  description:
    '"Hello, GPT!": A simple ChatGPT-powered app' +
    " built with Next.js and Tailwind CSS",
};

export default function RootLayout({ children }) {
  return (
    <html lang="en">
      <body className={robotoFlex.className}>{children}</body>
    </html>
  );
}
Adding the assets we'll need
Second, we need to place the following files into the folder public:
three-dots.svgwaving-hand.svg
three-dots.svg
We use the three-dots.svg loader from Sam Herbert's (Twitter: @Sherb) excellent SVG Loaders project (https://samherbert.net/svg-loaders/), in which he has released a collection of SVG loaders under the MIT License.
Download the repo on GitHub here: https://github.com/SamHerbert/SVG-Loaders.
Navigate to svg-loaders/three-dots.svg and copy-and-paste, cut or drag-and-drop the file into the public folder of your project.
In addition, by default the animation is white (with colour code #fff). We will change the colour to a blue grey. Open public/three-dots.svg and in the second line with the opening svg tag, find the following attribute: fill="#fff". Replace #fff with the colour code #94a3b8 and hit save.
waving-hand.svg
We use the waving hand emoji from Twitter's Twemoji project (https://twemoji.twitter.com/). The graphics for the project are licensed under CC-BY 4.0 and the code is licensed under the MIT License.
The repo is available on GitHub here: https://github.com/twitter/twemoji.
But due to the large number of emojis in the collection, it can be quite difficult to navigate the repo. Instead, we can use the Twemoji Cheatsheet developed by Shahriar Khalvati (GitHub: @ShahriarKh) to find the SVG waving hand emoji: https://twemoji-cheatsheet.vercel.app/. (The SVG is also directly available here: https://cdn.jsdelivr.net/gh/twitter/twemoji@14.0.2/assets/svg/1f44b.svg.)
In any case, download the SVG, rename it to waving-hand.svg and place it into the public folder of your project
At this point, if your web app hasn't already auto-reloaded, run npm run dev. The web app should function as intended.
In the following sections in this chapter, we're going to break down our ChatGPT-powered backend point and our simple frontend UI.
Breaking down our ChatGPT-powered endpoint
In this section, we'll walk through the logic for our backend endpoint. Here, the subsection headers loosely correspond to the comments in app/api/hello/route.js.
Dynamically rendering our endpoint
When using Next.js with the App Router, backend endpoint responses can be statically or dynamically rendered:
- Static rendering (the default setting): When a request is received, the backend endpoint generates a response, caches (stores) the response on the server-side, and then reuses it for subsequent requests
- Dynamic rendering: Each time a request is received, the backend endpoint generates a new response from scratch
By default, the Next.js App Router will use static rendering whenever possible for backend endpoint. This is because in many cases, the response from an endpoint won't be different and in this kind of situation caching will lead to faster load times and a better user experience.
For our backend endpoint, we want to use dynamic rendering. To do this, we add the following code at the top of route.js:
export const dynamic = "force-dynamic";
try-catch and async-await
For this web app, we'll make use of the OpenAI API's create chat completion endpoint. As we'll be sending a request to OpenAI's servers, we're going to use the try-catch and async-await patterns. In our try block, we'll try to send request to the OpenAI completion endpoint.
To send a request to the OpenAI create chat completion endpoint, we use the JavaScript Fetch API to specify the request that we want to send to OpenAI's servers. (See the next section for more on the parameters we'll use.)
As this involves sending a request to OpenAI's servers, this method returns a promise. To resolve the promise, we use the async-await pattern, prefixing our handler(...) function definition with the keyword async and our fetch(...) function call with the keyword await. We store the response returned by OpenAI's servers in the constant variable createChatCompletionRes.
Create chat completion endpoint parameters
There are several parameters that can be specified when using the create chat completion endpoint. We discuss the two required parameters, which we have specified in createChatCompletionReqParams:
modelmessages
Optional parameters include temperature, n, stream and others, which we won't discuss here to keep things simple. See the OpenAI API docs page on the create chat completion endpoint for a reference list of the possible parameters: https://platform.openai.com/docs/api-reference/chat.
Models
We use the AI model that is used for OpenAI's ChatGPT product, the GPT-3.5 Turbo model, specified in our parameters as gpt-3.5-turbo. It's training data has a cut-off date of September 2021.
There are other GPT models such as the GPT-4 model (gpt-4). These models involve trade-offs between capability, cost and speed. In the case of the GPT-4 model, this model has more advanced capabilities than the GPT-3.5 Turbo model, but is more costly to use.
See the full list of GPT models available through the OpenAI API here: https://platform.openai.com/docs/models.
Messages
The parameter messages consists of an array of objects, which we'll call messages. A message has the following properties:
- A message has two parameters:
roleandcontent - The
roleparameter has three possible values:"system","user"and"assistant" "system": A system message is optional and is typically the first message. It is generally used to set the behaviour of ChatGPT"user": User messages correspond to instructions given to ChatGPT either by the users or developers of an application"assistant": Assistant messages correspond to replies (completions) generated by ChatGPT earlier in the conversation or to example replies provided by users or developers- The
contentparameter must be a string value
Here is an example for messages:
[
  {
    role: "system",
    content:
      "You are a helpful chatbot that answers messages in one sentence.",
  },
  { role: "user", content: "What animals can I see at the zoo?" },
  {
    role: "assistant",
    content:
      "You can see a variety of animals at the zoo, including lions and elephants",
  },
  { role: "user", content: "Please provide more examples." },
];
Prompts
For our web app, to keep things simple, we will only provide a single user message.
The aim of our prompt is to generate variations of "Hello, World!"
To achieve this aim, we use a "show and tell" approach in writing our prompt:
- We tell the model our aim:
Write five variations of "Hello, World!" - We provide it additional instructions:
Start each variation on a new line. Do not include additional information. - And we show it an example,
Here is an example:Hello, World!,Bonjour, Earth!,Hey, Universe!,Hola, Galaxy!andG'day, World!
The OpenAI API docs include a more comprehensive discussion of prompt design in its sections on text completions (https://platform.openai.com/docs/guides/completion) and chat completions (https://platform.openai.com/docs/guides/chat).
Sending our request using the Fetch API
We send our request to OpenAI's servers using the built-in JavaScript Fetch API. Practically speaking, the Fetch API provides us with tools to work with HTTP requests and responses, with the primary tool being the fetch(...) method.
You can learn about the Fetch API in greater detail at MDN Web Docs:
- Using the Fetch API: https://developer.mozilla.org/en-US/docs/Web/API/Fetch_API/Using_Fetch
- Fetch basic concepts: https://developer.mozilla.org/en-US/docs/Web/API/Fetch_API/Basic_concepts
fetch(): https://developer.mozilla.org/en-US/docs/Web/API/fetch
In our web app, we provide the fetch(...) method with two arguments:
- The URL of the endpoint we want to send a request to: In this case, the url of the create chat completion endpoint URL,
createChatCompletionEndpointURL, which has the string value"https://api.openai.com/v1/chat/completions" - An object describing the request that we would like to send: There are many options that can be specified. We specify three such options:
method,headersandbody
Structuring our request
Next, we discuss the options that we specify for our request in greater detail.
Request method
We specify the HTTP method, method, as the POST method, "POST", per the OpenAI API reference for the chat completion endpoint: https://platform.openai.com/docs/api-reference/chat.
Request headers
We specify two headers, headers, for our request:
"Content-Type": We specify the content type as"application/json", which tells the user's browser to expect a response containing content in a JSON formatAuthorization: We specify our OpenAI API key as a bearer token using the following string, making use of ourOPENAI_API_KEYenvironment variable:"Bearer " + process.env.OPENAI_API_KEY
Request body
We specify the parameters for the chat completion we would like to create using the body parameter. The body parameter takes a JavaScript object in string form, often called a JSON string.
Fortunately, we can use the JSON.stringify(...) method for this purpose, passing in our object of parameters, createChatCompletionReqParams.
Processing the response body
The completions returned by ChatGPT will be contained on the body of the response. We want to access the body of the response as a JavaScript object.
The response returned by the create chat completion endpoint, createChatCompletionRes, is an object of type Response. To access the body of the response as a JavaScript object, we can call this object's json() method.
As this method returns as a promise, we prefix our method call with the keyword await. We store the response body in the variable createChatCompletionResBody.
Error handling for the OpenAI endpoint
Our request to OpenAI's servers could fail for any number of reasons. For example, our API key may be invalid or our Internet connection may not be reliable.
Therefore, when preparing the response for our endpoint, /api/hello, we want to be able to send a successful response and an unsuccessful response, reflecting the success or not of our request to OpenAI's servers.
To determine if the request to OpenAI's server was successful or not, we can look at the status property of the response object, createChatCompletionRes.
If the request was successful, the response will have a status code of 200. Otherwise, it will have a different status code such as 400.
Therefore, once the response from OpenAI's servers have been returned, we check the status on the response.
If it is not 200, then we create an object error of type Error. We specify several properties on this object:
message: We specify this by the string we pass into the object's constructor:"Create chat completion request was unsuccessful."statusCode: We pass in the status code on the response returned by OpenAI's serversbody: We pass in the body of the response returned by OpenAI's servers, as OpenAI will provide us with data about what went wrong
Note that message is a default property of objects of type Error, while statusCode and body are not.
Then, we throw the error using the throw keyword. This will cause our web app to exit the try block and enter the catch block. We will have more to say about the logic in the catch block shortly.
Properties on the response body
The response body
We already mentioned that the response body will contain useful information. Here is an example of a response body for our endpoint:
{
  id: "chatcmpl-6t8rMBDJrAr7GUW4FPh5K7bzp4jWY",
  object: "chat.completion",
  created: 1678600116,
  model: "gpt-3.5-turbo-0301",
  usage: { prompt_tokens: 58, completion_tokens: 26, total_tokens: 84 },
  choices: [
    {
      message: {
        role: "assistant",
        content:
          "\n" +
          "\n" +
          "Hi, Earth!\n" +
          "Greetings, Planet!\n" +
          "Yo, Cosmos!\n" +
          "Ni hao, Universe!\n" +
          "Aloha, World!",
      },
      finish_reason: "stop",
      index: 0,
    },
  ],
}
We are particularly interested in two properties: usage and choices, which we describe further in the following sections.
Token usage
The value of the usage property is an object that contains information on token usage. OpenAI API usage is charged on a per-token basis. At the time of publication, for the gpt-3.5-turbo model, that is at a rate of $0.002 per one thousand tokens.
The usage objects contains information on the number of tokens consumed to process our prompt (prompt_tokens) and the completion (completion_tokens), as well as the total number of tokens consumed (total_tokens).
In our web app, we store the usage property in a variable usage of the same name.
Response messages and choices
The value of the choices property is an array that contains the completion message in response to our prompt.
It is an array as in our create chat completion request, we are optionally able to indicate that we would like ChatGPT to generate multiple completions in response to our text (put another way, multiple choices), from which we could then choose the best or otherwise integrate into our application another way.
In our request, we could have specified the number of choices to generate using the n parameter. This parameter has a default value of 0.
For the purposes of our /api/hello endpoint, we are only interested in the completion text. We store the completion text in the variable completionText. Here, we have also used the string method trim() to remove the unnecessary new line characters (\n) from the start of the completion.
Logging the results
On the server side, it's useful to implement some basic logging. For a successful response, we log in the console the completion text using the variable completionText and data on token usage using the usage variable.
Sending a successful response for our endpoint
Handling the success case
Finally, we prepare the response for our /api/hello endpoint for a success case. We return a response with the following properties:
- Body: The response has a JSON body with a single property that has the name
completionand its value given by the variablecompletionText - Status code: The response has the success HTTP status code
200 - Content type: The response has its
"Content-Type"specified as"application/json"
Error handling
If our request to OpenAI's servers is unsuccessful, then our web app will exit the try block after throwing the error we specified (throw error). After that, it will enter the catch block.
We have passed the thrown error, error, into our catch block, and so have access to it in our error handling logic.
Sending an unsuccessful response for our endpoint
Server-side error logging
In the unsuccessful case, we log the contents of error into the server-side console, which will help us debug unsuccessful requests to OpenAI's servers.
Preparing the unsuccessful response
Like in the success case, we end the unsuccessful case by preparing the response for our /api/hello endpoint. We return a response with the following properties:
- Body: The response has a JSON body with a single property
errorthat corresponds to an object with amessageproperty containing a simple error message:"An error has occurred" - Status code: The response has a HTTP status code that mirrors the status code on the response returned by OpenAI's servers, if it is defined. Otherwise, if
error.statusCodeis undefined, then we set the status code as500, which is customarily used for handling unexpected errors - Content type: The response has its
"Content-Type"specified as"application/json"
That brings our breakdown of the logic for our backend API endpoint to a close. In the next section, we'll break down our simple frontend UI for this web app.
Breaking down our simple frontend UI
In this section, we're going to walkthrough the logic for app/page.js. As before with our walkthrough of app/api/hello/route.js, the subsection headers loosely correspond to the comments in page.js.
Defining state hooks
We begin by defining the state hooks we will use in our web app. State hooks help us manage the flow of data in our web app. Each state hook consists of a state variable and a hook function. We define two state hooks:
replyandsetReply: Thereplystate variable will store the completion text contained in the response returned by the/api/helloendpoint when the request to OpenAI's servers is successful. When the request isn't successful, it will store an error messageloadingStatusandsetLoadingStatus: TheloadingStatusstate variable will have a boolean value that istruewhile a request is sent to the/api/helloendpoint and the frontend of our web app is waiting for a response andfalseotherwise. While theloadingStatusstate variable istrue, we will show the user a loading indicator. This will substantially improve the user experience of our web app
Making a client-side request to our endpoint
Next, we make a request to the /api/hello endpoint from our frontend. We write a function onSubmit(...), that will be triggered on clicking the "Say hello" button.
When the user clicks the "Say hello" button, in web development parlance, we say that an event has been triggered. We then call the onSubmit(...) the event handler. In this and other cases, our web app will automatically pass an event object (typically denoted event or e) to our event handler, which provides us with access to additional features.
Indeed, we begin the implementation of onSubmit(...) by calling the preventDefault() method of the event argument, event. This is because our event handler is attached to a HTML form element, and we would like to disable the default behaviour of triggering a form submission.
Following that, we use the try-catch pattern to try and send a request to our /api/hello endpoint. We sandwich our try and catch blocks with hook calls setLoadingStatus(true) and setLoadingStatus(false).
In the try block, we use the fetch(...) method to send a request to our /api/hello endpoint. In this case, as we are not specifying any parameters or a body on our request, we need only pass the endpoint URL "/api/hello" to the fetch(...) method. Also, as we have not specified a HTTP method in our argument for fetch(...), our request will use the default method, GET, which suits our purposes just fine.
We store the result in the variable response and also prefix our method call with the keyword await (and our function definition with the keyword async) as is customary when using fetch(...). We store the response body in the variable body, prefixing the method call response.json() with the keyword await as well.
Next, we call the setReply(...) hook. We use the conditional ternary operator to pass in the argument that we will assign to our state variable reply. If the status code of the response (response.status), which mirrors the status code on the response to our request to OpenAI's servers, is 200, then we pass in the completion text attached to the body of the response (body.completion) as our argument. If the status code isn't 200, then that means the logic in our /api/hello endpoint threw an error. In this case, we set the reply to be the error message we specified (body.error.message).
If some other unexpected error occurs, control will enter the catch block. In this case, we set the reply directly as the following error message: "An error has occurred"
Creating the UI
We write the React UI using JSX, which combines aspects of HTML, CSS and JavaScript. We'll use Tailwind CSS to style our UI.
Next, we'll walkthrough the key parts of our UI.
The "use client" directive
The UI of our web app is given by the page app/page.js. For this page, we would like to use the useState React hook. As state and lifecycle effects are only available in Client Components, we must therefore declare our page as a Client Component. To do this, on the first line of page.js we add the client directive "use client"
Structure of our main element
The main element should contain the primary content of our web app. In this case, we specify a container with the following attributes using Tailwind CSS:
h-screenandmax-w-xs: The height of the container will be the height of the screen of the device the user is using. Since HTML elements will often automatically expand horizontally but we do not want our elements to necessarily expand to a specific width, we specify the max width as "extra small". This also means our web app will be mobile friendlymx-auto: This centers the container horizontally in the pageflexandflex-col: Although the container has been centred horizontally in the page, elements in the container may not be centred horizontally within the container itself. To address this, we can useflexto specify our container as a flexbox and the components and elements inside of it as flex items. By default, however, this will align our flex items along a horizontal axis. Specifyingflex-colwill align our flex items along a vertical axis instead
The h1 for our web app
Here, we insert the name for our web app: Hello, GPT! We add some HTML and CSS to position the element appropriately and make it stand out.
Using the Image component to show waving-hand.svg
To insert images in Next.js, we use the special Image component, rather than the traditional img HTML element. We use waving-hand.svg as the main image for our web app.
To learn more about how the Image component is used, see the Next.js docs: https://nextjs.org/docs/app/api-reference/components/image.
Adding interactivity: form component and onSubmit(...)
We use the HTML form element to add the main interactivity for our web app. The form element has an attribute onSubmit, which we can use to specify an event handler that is triggered when a form submission is registered. We specify our own onSubmit(...) function. The variable onSubmit is surrounded by curly brackets, as is done when specifying JavaScript variables
As a child element of the form element, we create a blue-coloured button using the button element. Importantly, we specify the attribute type with the value "submit", which will ensure the onSubmit event handler is triggered when this button is pressed. As a further child element of the button element, we use a paragraph p element to add some text onto our button: "Say hello".
Rendering the reply state variable with a loading indicator
There is a short but noticeable delay between when we send our request to OpenAI's severs and when the response is returned and processed. This delay will generally be longer if our desired prompt and completion are longer.
To improve the user experience of our web app, we want to add a loading indicator that is shown immediately after we send our request to OpenAI's servers and then replaced with the completion text once the response has returned and been processed.
To do this, we insert JavaScript into our component. Within curly brackets we use a ternary operator: If the state variable loadingStatus has the value true, then we display an Image component showing the loading animation three-dots.svg. Otherwise, loadingStatus is false, and in this case we display the contents of the state variable reply within a p element.
Notice here that since the default value of the state variable reply is the empty string, on initial load our web app will display this string, but it will simply be an empty string within a p element and, therefore, not be visible to the user.
Summary and next steps
In this chapter, we built a simple “Hello, World!”-inspired app powered by OpenAI’s ChatGPT API with Next.js and Tailwind CSS. We covered the following topics:
- Accessing the OpenAI API, including using environment variables in Next.js
- Writing a ChatGPT-powered endpoint (
/api/hello) for our app in Next.js and using the Fetch API - The basics of using the
gpt-3.5-turbomodel and the create chat completion endpoint, including tokens and error handling - Creating a simple frontend UI in our app using React via Next.js and Tailwind CSS and hooking it up to our endpoint
This web app can serve as a spring board for bringing lots of simple applications of the ChatGPT API to life. This is as simple as editing promptText in app/api/hello/route.js and updating app/page.js to create a more relevant UI. The possibilities really are endless, and that's incredibly exciting.
In the next chapter, we'll build on the skills we've learnt in this chapter to build a chatbot powered by the ChatGPT API.